How to Choose Your Wedding Day Makeup: Timeless Bridal Beauty Tips
Learning how to choose wedding day makeup is less about finding the prettiest look on the internet and more about finding the version of you that will still feel right at midnight, in every photograph, after twelve hours of hugging, happy tears and dancing. Your wedding makeup has to do three jobs at once: look like you, photograph beautifully, and last all day — and the looks that manage all three are almost always the timeless ones, not the trendiest ones.
The good news is that choosing your bridal look is a decision you can make step by step, not a guessing game. Your everyday makeup, your dress, your venue, the light at your ceremony hour and your skin all point toward the same answer, and once you know how to read those clues, the choice gets simple. This guide walks you through exactly that: a five-step framework for how to choose wedding day makeup, how to match foundation and finish to your skin, whether to hire an artist or do it yourself, how to run a trial that actually answers your questions, and the small mistakes that ruin an otherwise perfect look — so you can walk down the aisle confident that your makeup is the last thing you need to think about.
Start With the Face You Already Love
The single most useful rule in bridal makeup is also the simplest: your wedding day makeup should look like you on your best day. Brides who love their photos twenty years later almost always say the same thing — they still recognised themselves. Brides who regret their look usually say the opposite: they let a trend, a well-meaning relative or a makeup artist talk them into a face that was not theirs.
So start with evidence, not inspiration. Look at how you already like to look. Do you wear a full face most days, or are you a tinted-moisturiser-and-mascara person? Do you reach for a red lip when you want to feel dressed up, or do you never leave the house without defined brows? The answers are your starting point, because your wedding look should be an elevated version of that everyday face — a little more definition, a little more polish, a little more staying power — not a stranger’s face glued on for the day.
A useful trick from bridal artists is to choose three feeling words before you choose any colours. Pick words like natural, polished and romantic, or modern, defined and glamorous, and let those three words filter every decision after this one. If a smoky eye does not fit “natural, polished, romantic”, it is out, no matter how beautiful it looked on someone else. If a bold lip fits “modern, defined, glamorous”, it is in. Three words are enough to keep a hundred Pinterest saves from turning into a confused face.
Then build a small, focused inspiration board — five to eight images that share one specific quality, like the same skin finish or the same lip tone — instead of fifty unrelated looks. Bring that board to your trial and you will have a conversation; bring fifty and you will have a shrug.
Match Your Makeup to Your Dress, Venue, and Lighting
Your makeup is one layer of a complete look, and it has to sit comfortably with the rest of it. A structured satin gown with a sleek chignon invites a polished finish — defined eyes, a clean lip, skin that looks finished. A bias-cut slip dress with loose waves suggests the opposite: skin-first makeup, a soft flush, barely-there definition. Neither is better; they simply belong to different weddings.
The venue and the light matter just as much. Morning light is soft and forgiving, golden hour adds warmth to everything, and candlelit receptions deepen shadows and swallow detail. Flash photography flattens colour and can amplify shimmer, so finishes are worth testing under each kind of light you will actually be photographed in — not just the bathroom mirror. As a rough guide, daytime and outdoor weddings suit lighter, softer makeup; indoor and evening weddings can carry more drama. A look that disappears in a sunlit garden can be exactly right in a candlelit ballroom, and a look that feels perfect at noon can look washed out by eight in the evening.
Your flowers and jewellery are clues too. Warm gold jewellery and a bouquet of blush and peach roses point toward warm tones on the face; cool silver and white flowers point toward cooler pinks and berries. None of this needs to match exactly — the makeup just needs to feel at home in the same room as everything else you are wearing.
How to Choose Wedding Day Makeup in Five Simple Steps
This is the framework that turns all of the above into a decision. Work through it in order, and write down your answer to each step — by the end you will have a look brief you can hand to an artist or follow yourself.
Step 1: Name your three feeling words
Natural, polished, romantic? Modern, defined, glamorous? Soft, glowing, effortless? These words are your filter for every choice that follows, from lip colour to lash style.
Step 2: Pick your skin finish
Skin finish is the biggest single decision, and it shapes everything else. A dewy finish looks fresh and youthful but needs setting to survive a long day. A satin finish is the safest middle ground — it photographs well in every light and holds up for hours. A matte finish is the longest-wearing but can look flat in photos if it is over-powdered. Most timeless bridal looks sit in the satin range, with glow added only on the high points of the face.
Step 3: Choose one feature to lead
Let one feature carry the look and let the rest of the face settle around it. If your eyes lead, keep the lips soft — a rose or nude-pink that does not compete. If your lips lead, keep the eyes simple — defined but quiet. If glow leads, keep both eyes and lips soft and let the skin do the talking. One feature leading is what makes a look feel clear and intentional instead of busy, and it is the difference between a face that photographs as one idea and a face that photographs as five competing ones.
Step 4: Match the look to the light and the day
Check your ceremony time and your venue against the guide above. A daytime garden ceremony calls for the lighter end of your range; an evening ballroom calls for the stronger end. If your day runs from bright afternoon into candlelight, choose the middle of your range and plan one small upgrade — a deeper lip or a touch more liner — for the evening.
Step 5: Test it under flash before you commit
Take photos of the look in daylight, in indoor light and with flash, and look at them on a screen, not just in the mirror. Makeup that looks like a little too much in the mirror often translates beautifully on camera, because distance and flash soften detail — but only the photo tells you whether that is true for your look. If the trial photos make you smile, the decision is made.
Get Your Foundation and Skin Finish Right
Nothing in bridal makeup matters more than the base, because the base is what the camera sees first. Start with undertone, not shade: warm skin leans golden, cool skin leans pink, neutral sits somewhere between, and olive undertones need a shade that does not pull orange or grey. Swatch along the jawline in natural daylight — never under shop lighting — and check the match on your face, neck and chest together, because the dress neckline puts all three in the frame.
A lightweight, buildable foundation keeps the complexion believable at close range and on camera, and it is almost always a better choice than one heavy coat. Apply in thin layers from the centre of the face outward, and remember that bronzing powder swept over the face, neck and chest stops the skin looking washed out in pictures. If your dress has a low neckline, the chest is part of the makeup — blend foundation down past the jawline and set it, or the face and the chest will photograph as two different people.
Two warnings from the photography side. First, avoid heavy HD or setting powders high in silica: they are the usual cause of the white, chalky cast that shows up under flash, not sunscreen. Chemist Michelle Wong’s tests for Lab Muffin Beauty Science found that the only powder giving severe flashback was an HD micro-powder that was more than 90% silica. A sheer, finely milled setting powder pressed lightly into the skin is safe; a thick layer of HD powder is not. Second, skip a foundation shade that is lighter than your neck — it will read as a mask in every photo. The detailed science on why some powders flash back is explained well in this guide to wedding makeup that lasts — worth a read before your trial so you know what to ask your artist to avoid.
Skin prep is the quiet half of this section. Start six to twelve months before the wedding for normal skin, earlier if you are treating a specific concern. Build a simple, consistent routine — gentle cleansing, moisturiser, daily SPF — and add facials or exfoliation gradually, months out, never in the final two weeks. The golden rule is no experiments close to the day: skin looks best when you stick with what already works. My winter skincare prep guide covers the same steady-routine thinking for the colder months, and the principle is identical whatever the season.
Pick One Feature to Lead
Here is how the four classic bridal directions compare, so you can see which one your three feeling words point to.
Natural: soft neutral shadow, defined brows, a rose or pink lip. Best for daytime and outdoor weddings, and for brides who rarely wear much makeup. It photographs as fresh and honest, and it is the most forgiving look if you cry.
Soft glam: warm taupes and browns, a soft gold shimmer, lashes optional, a warm rose lip. The safest middle for most brides — it suits most venues and mixed light, and it is the easiest look to wear for twelve hours without feeling overdone. If you want a worked example of the same blending rhythm, my soft glam smoke makeup guide walks through it step by step.
Classic: a four-shade eye (base, lid, sparkle, dark liner), a berry or rose lip, polished skin. Best for formal, indoor weddings. It is the most timeless of the four — the look in the photographs your mother still loves.
Bold lip: plain eyes, one strong lip colour, liner and blotting. Best for a simple dress and an evening wedding. The lip is the whole statement, so everything else stays quiet — and you will need to reapply it, so it lives in the touch-up kit.
One caution on lip colour: bridal artists consistently steer brides toward pink, rose and berry, and warn that beige and pale nude lip colours wash out in photographs. If you love a nude lip, choose one with a rose or mauve undertone and line it with a pencil a shade deeper — the definition is what keeps it visible on camera.
For more on narrowing down a look, see a guide to finding your bridal makeup look.
Hire a Makeup Artist or Do It Yourself?
There is no wrong answer, only a wrong reason. Hire a professional if you want the morning to feel calm, if you are nervous about longevity and photography, or if you rarely wear a full face of makeup. A good bridal artist brings two things you cannot buy in a shop: products that are proven to last twelve hours, and the knowledge of how makeup translates to camera. Do it yourself if you genuinely enjoy doing your makeup, you already own long-wear products you trust, and you have practised the exact look at least twice — including one full-day wear test with photos.
If you hire, book six to twelve months ahead, and earlier for peak-season Saturdays. When you interview artists, ask the questions that actually matter: how many weddings have you done, do you have photos of brides in daylight and with flash, what products do you use for longevity, and what happens if you are ill on the day? Pick an artist who understands photography and video, because that is where most bridal makeup succeeds or fails. It is very easy, for example, to choose a concealer shade that is too light for photos, and an experienced bridal artist will know that before you do.
Cost is part of the decision and worth planning for. A professional bridal makeup application typically costs far more than doing it yourself, but it buys the trial, the artist’s kit, the morning’s calm and the insurance of someone whose job is to make the look last. Doing it yourself costs only the products — but budget for the products you will actually need (long-wear foundation, waterproof mascara, setting spray, a lipstick you can reapply) and for the two practice runs, including the wear test. Whichever route you choose, do not try a brand-new product for the first time on the wedding day.
The Bridal Makeup Trial: What to Do and When
The trial is non-negotiable, whether you hire an artist or do the look yourself. It is your one chance to see the look on your face, in your light, in photographs, before the day it has to be perfect. Book it four to eight weeks before the wedding — close enough that your skin, hair colour and dress are final, but with time to change the look or the artist if it does not feel right.
Bring these five things to the trial: your inspiration board (five to eight images, not fifty), a photo of your dress, your veil or hairpiece if you have it, a white or ivory top so you see the makeup against a colour close to the dress, and the lipstick you are considering. Wear your hair roughly the way you will wear it on the day — an updo changes how the face reads, and a trial done with hair down can mislead you about the whole look.
During the trial, photograph the finished look three ways: in daylight by a window, indoors under the kind of light your venue has, and with flash. Look at the photos on a screen before you decide anything. Makeup that feels like a little too much in the mirror often looks exactly right in photographs, and only the photos can tell you which side of that line you are on. Ask for the look to be photographed after an hour, too — longevity is something you check, not something you assume.
Leave the trial with five clear decisions written down: the skin finish, the eye definition, the brow balance, the lip direction, and the touch-up plan. If any of those five is vague, the trial is not finished. And if you are doing your own makeup, run the same trial on yourself twice: once to learn the look, once as a full dress rehearsal with the exact products, the exact timing and the exact photos.
Make It Last From the First Look to the Last Dance
Wedding days are long — twelve hours or more from the first photo to the last dance — and bridal makeup is built to survive all of it. The method is layering: hydrated skin and primer first, then thin layers of long-wear, waterproof products, cream products before powders, every layer set lightly with powder, and a setting spray at the end. Thin layers last; one thick layer cracks, creases and slides.
Waterproof mascara and liner handle tears, and they are worth it even if you are sure you will not cry — everyone cries at their own wedding, or at someone else’s speech. Set the under-eye area with a sheer powder so concealer does not crease, and keep shimmer away from the T-zone if you tend to shine; glow belongs on the cheekbones and the brow bone, not the centre of the forehead.
Season and weather are part of the plan. In summer heat, use a mattifying primer and an anti-shine setting product, and keep the base light — a glossy finish in humidity turns to shine within an hour. In winter, a foundation that is too matte can look cakey in dry air, so keep the skin hydrated underneath and choose a satin finish. If your wedding runs from day into night, the look needs to be sturdy enough for both: that is exactly what the thin-layer method is for.
Your Wedding Morning Makeup Timeline
A calm morning is a planned morning. Here is a realistic timeline for a bride whose ceremony is at 4:00 pm, with hair and makeup starting mid-morning.
10:00 am — hair begins. Makeup starts after hair is mostly set, because hairspray and heat travel. Eat a real breakfast before this, and keep water nearby all morning.
11:30 am — skin prep. Cleanse, moisturise, let it absorb fully, then primer. This quiet fifteen minutes is what the whole look sits on — do not rush it.
12:00 pm — base and eyes. Foundation in thin layers, concealer, powder through the centre of the face, then the eye look, brows and liner. Eyes take the longest, so they get the most time.
1:00 pm — cheeks, lips and setting. Blush and bronzer, lip liner and lipstick (blot, then a second coat), setting spray. Then stop touching the face and let it set.
1:30 pm — the photo check. Photograph the finished look in daylight and with flash, and check it on a screen. This is your last easy moment to adjust anything.
2:00 pm — dress, veil, final touches, and the touch-up kit goes into the bag. From here on, the look is maintained, not rebuilt.
Adjust the clock to your own ceremony time, but keep the order and the gaps: skin prep needs time to absorb, setting spray needs time to dry, and the photo check needs to happen before the dress goes on, when a fix is still a five-minute job instead of a crisis.
Bridal Makeup Mistakes to Avoid
1. Trying a brand-new look on the wedding day. If you have never worn a smoky eye or a red lip, your wedding is not the day to meet them. Fix: everything gets a trial, and the trial gets photos.
2. Choosing a foundation shade that is too light. It reads as a mask in photographs, especially next to a bare neck and chest. Fix: match to the jawline in daylight, and blend down the neck and chest.
3. Piling on HD powder. The white flashback cast in photos usually comes from silica-heavy powder, not from sunscreen. Fix: sheer, finely milled powder, pressed lightly into the skin.
4. Skipping the wear test. A look that is perfect at 11:00 am can be gone by 6:00 pm. Fix: wear the trial look for a full day, including through a meal and a walk outside.
5. Ignoring the venue light. A look chosen under bathroom lighting can disappear in a sunlit garden or look harsh in candlelight. Fix: test the look in the light you will actually be photographed in.
6. Letting trends override your own face. A trendy look that is not yours will date faster than a timeless look ever will — and it will not feel like you in the photos. Fix: your three feeling words are the filter, and they outrank every trend.
7. Forgetting the touch-up kit. Even a perfect look needs a lipstick reapplication after dinner and a powder check before the first dance. Fix: pack the kit (next section) and give it to someone reliable.
Your Wedding Day Touch-Up Kit
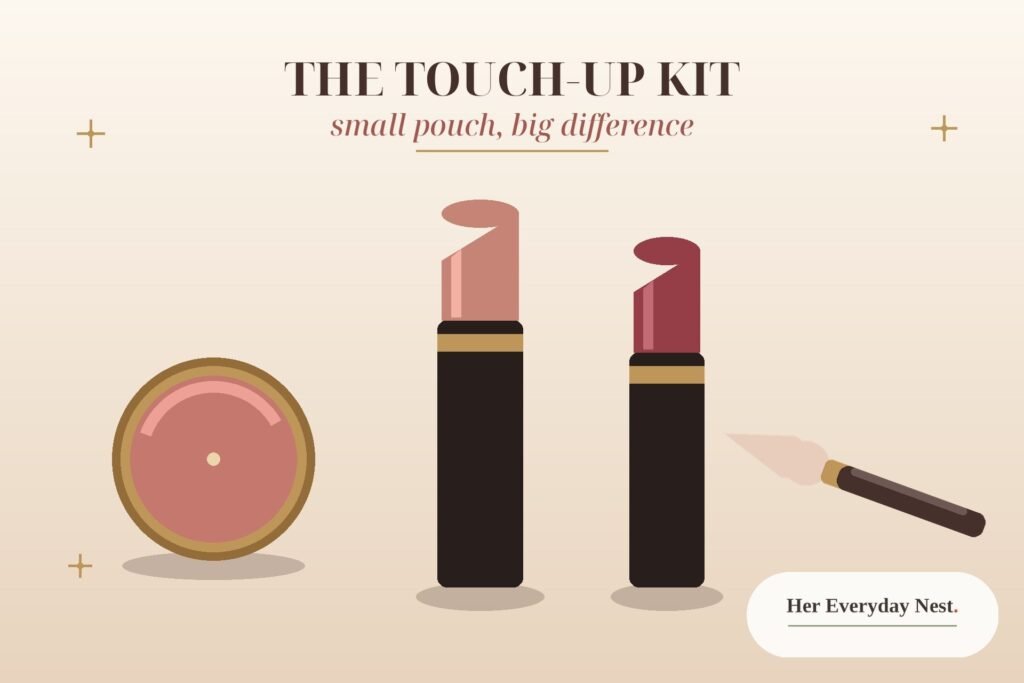
Pack this the night before and hand it to your maid of honour or your mother — not to yourself, because you will not have a free hand. It fits in a small pouch: your lipstick plus the lip liner, a pressed powder or blotting papers, a mini setting spray, a few cotton buds for cleaning up smudges, bobby pins, and a small mirror. That is the whole list. The lipstick and the powder do ninety percent of the work; everything else is insurance. Check the kit once after the ceremony and once before the first dance, and otherwise forget about your makeup completely — that is the point of choosing it well.
Knowing how to choose wedding day makeup comes down to one idea: the best bridal look is the most honest one. Start with the face you already love, match it to your dress and your light, let one feature lead, test it under flash, and give it a proper trial. Do that, and your makeup will do its job quietly all day — looking like you, photographing beautifully, and lasting from the first look to the last dance. And when you look at those photographs in twenty years, you will still recognise the woman in them. That is what timeless means.
For the rest of the day, your hair matters just as much as your makeup — my festive hairstyles guide covers looks that pair beautifully with a polished bridal face. And if you want to see the soft glam direction worked through as a full look, start with my soft glam smoke makeup guide: it is the same elevated-you thinking, applied to one complete face.
When should I book my bridal makeup trial?
Book your makeup artist six to twelve months before the wedding, and schedule the trial four to eight weeks before the big day. That window is close enough that your skin, hair colour and dress are final, but leaves time to change the look or the artist if the trial does not feel right. Bring inspiration photos, wear a white or ivory top, and photograph the finished look in daylight and with flash before you decide.
Should I hire a makeup artist or do my own wedding makeup?
Hire a professional if you want the day to feel calm, if you are nervous about longevity and photography, or if you rarely wear a full face of makeup. Do it yourself if you genuinely enjoy doing your makeup, you already own long-wear products you trust, and you have practised the exact look at least twice, including a full-day wear test with photos. Either way, a trial — with the artist or on yourself — is non-negotiable.
How do I make my wedding makeup last all day?
Longevity is built in layers: hydrated skin and primer first, then thin layers of long-wear, waterproof products — cream products before powders, every layer set lightly with powder, and a setting spray at the end. Waterproof mascara and liner handle tears, and a small touch-up kit (lipstick, powder or blotting papers, setting spray) keeps the look fresh from the ceremony to the last dance without a full redo.
What makeup should I avoid in wedding photos?
Avoid heavy HD or setting powders high in silica, which can flash back white under camera flash and leave a chalky cast in photos. Skip a foundation shade that is lighter than your neck and chest, skip brand-new products you have never worn before, and be careful with very pale nude lipstick, which can wash you out on camera. Test every product with flash photography at your trial so there are no surprises in the album.
How far in advance should I start my skincare routine before the wedding?
Start six to twelve months out for normal skin, and earlier if you are treating a specific concern such as breakouts or sensitivity. Build a simple, consistent routine — gentle cleansing, moisturiser, daily SPF — and add facials or exfoliation gradually, months before the wedding, never in the final two weeks. The golden rule is no experiments close to the day: your skin looks best when you stick with what already works for you.

Emily Carter is the founder and editor of Her Everyday Nest. After nine years of renting in five apartments across three cities, she's learned how to make any rental feel like home.