
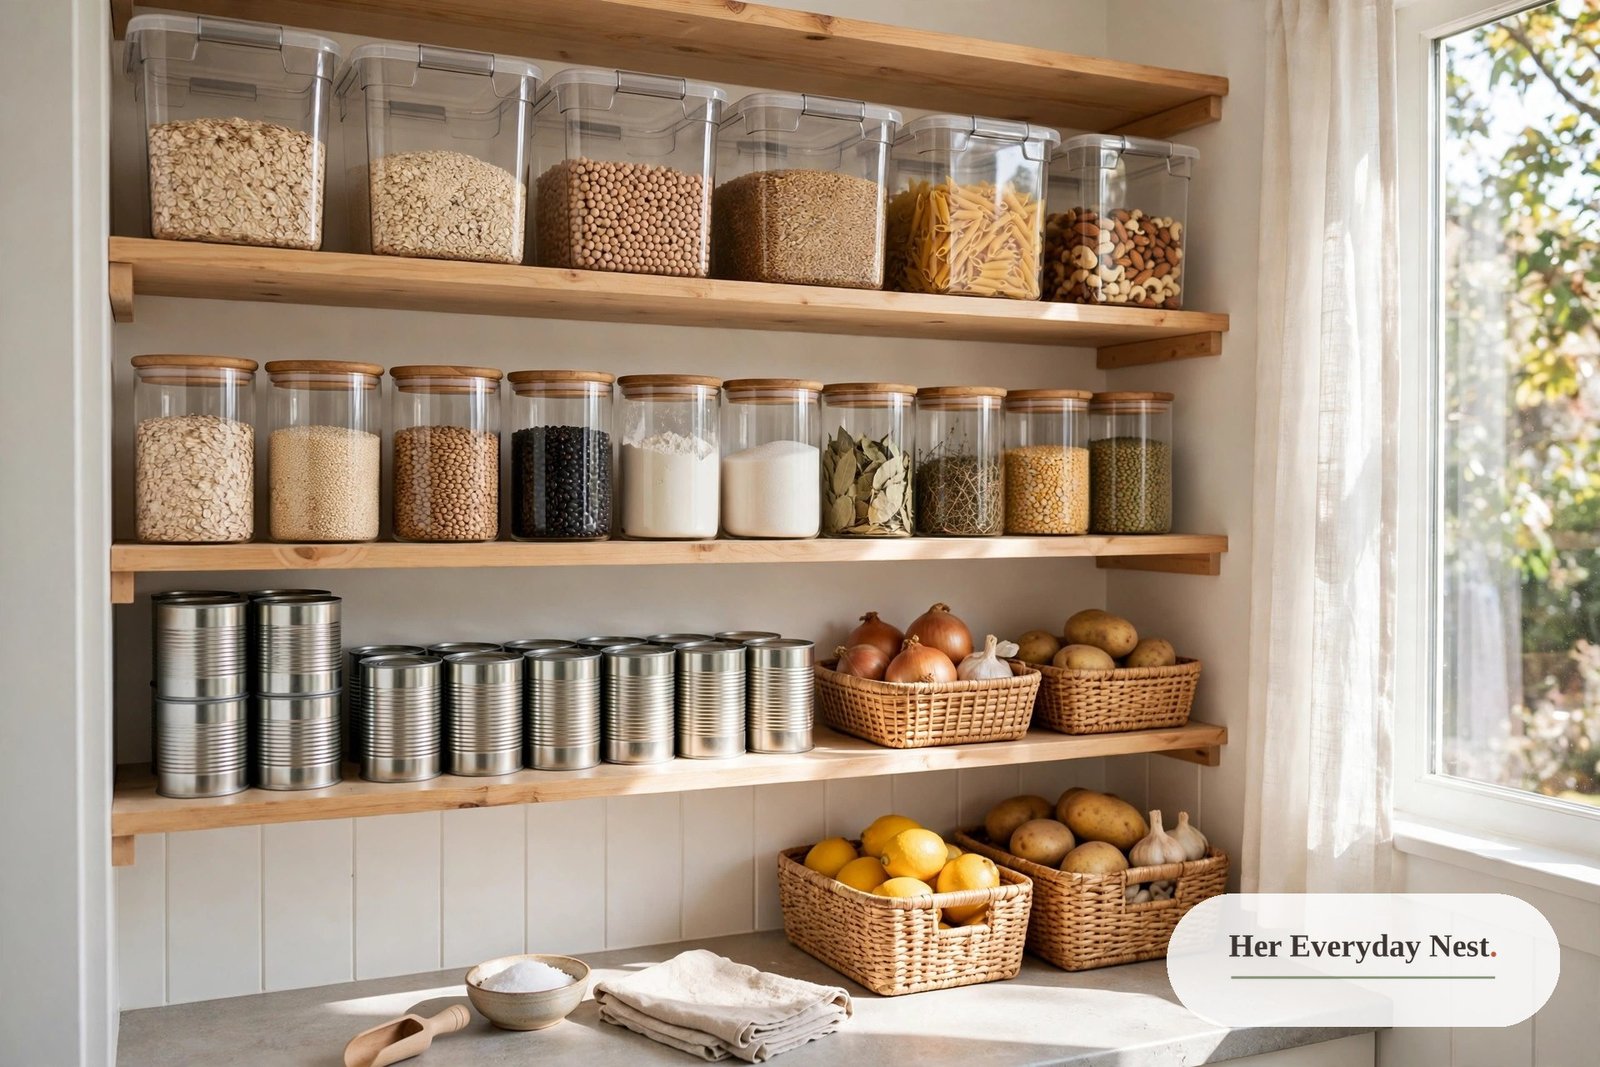
15 Renter-Friendly Pantry Organization Ideas (Small Kitchens)
A small rental pantry has a way of turning into a guessing game. You know there is pasta in there somewhere, but buying more feels easier than unpacking half a shelf to find it. The chips slide off the top, the spices multiply, and the back of the cupboard becomes the place where food quietly expires. These renter friendly pantry organization ideas fix that without a single hole in the wall, a built-in shelf, or a landlord conversation — every solution below is removable, portable, and sized for the single cabinet, narrow closet, or claimed shelf that most rentals actually have.
The reason most pantry systems fail in rentals is not the size of the space. It is that organizers get bought before the pantry gets understood. A bin that does not fit the shelf depth, a turntable in a cabinet that is too narrow, a door rack on a door that will not close — all of it ends up in a drawer, and the pantry goes back to chaos. The order below is deliberate: sort and measure first, then add only the organizers that solve a problem you actually have. That is how a 4-square-foot pantry ends up holding more than a walk-in that was never planned.
Below are 15 renter friendly pantry organization ideas for small kitchens, each with what it costs, what it suits best, and the renter rule that matters — no drilling, no permanent changes, and everything comes with you when you move. Start with the first three ideas, add organizers only where a shelf is still hard to use, and let the zones do the rest.
1. Empty, Measure, and Purge Before You Buy Anything
Every good pantry starts with an empty shelf, not a shopping trip. Take everything out and put it on the counter or kitchen table — a small pantry is usually quick enough to empty in one go, and seeing everything at once is what makes the rest of the process work. Wipe the shelves down, check for crumbs or spills, and then measure: height between shelves, depth, and width, plus any awkward spots like a pipe or a narrow gap beside the door frame.
While everything is out, sort it into four piles: keep (in date, in good condition, something you actually eat), use soon (close to its date or already opened), donate (unopened and in date but not something you will use — many food banks accept unopened non-perishables), and toss (past its date, stale, or damaged). Spices expire too, and so do baking ingredients, so check those dates as well. Organizing clutter just creates organized clutter — a small pantry can hold everything a household eats regularly, but it cannot hold everything plus duplicates, expired items, and the specialty spice you used once in 2024. Best for every pantry type, and the only step that costs nothing.

2. Group Everything Into Categories Before You Assign Shelves
Now sort what you are keeping into groups, before a single bin gets bought. The exact groups depend on how you cook, but a typical small pantry uses breakfast (cereal, oats, spreads, tea and coffee), grains and pasta (rice, pasta, noodles), cans and jars (beans, tomatoes, soups, sauces), baking (flour, sugar, baking powder), snacks (chips, crackers, granola bars, nuts), oils and condiments, and spices. Add one more group: use first, for opened or close-to-date items that need eating this week.
Look at the size of each group before you assign space. A big pile tells you it needs more room or a larger bin; a tiny pile can be combined with another group. This is also the moment to notice what you overbuy — if there are four half-open bags of the same rice, the system needs a one-open-bag rule, not a bigger shelf. These renter friendly pantry organization ideas work because the categories come first and the containers follow; buying bins first is how you end up with beautiful containers that hold the wrong things. Best for anyone whose pantry currently has no logic at all.

3. Assign Zones by How Often You Use Things
This is the step that makes a small pantry feel bigger. Instead of putting things back wherever they fit, give each category a fixed zone based on how often you reach for it. Eye level is prime real estate: everyday items like breakfast foods, snacks, and the use-first bin. The top shelf takes lighter, less-used things — backup paper goods, holiday baking supplies, bulk refills. Lower shelves and the floor take the heavy items: cans, jars, bottles of oil, big bags of rice. Keeping heavy things low is safer and easier on your back, and light things up high means you are never lifting a bulk bag over your head.
The door is a zone too: small, flat items like spice packets, sauce sachets, foil, and wraps. If kids or roommates share the pantry, put the snacks they are allowed to grab at their height and keep the rest higher. And respect the zones once they are set — if a category outgrows its bin, adjust the zone rather than squeezing items elsewhere, or the whole system drifts back to chaos within a month. Best for shared kitchens and anyone who cooks daily.
4. Add Shelf Risers to Double Your Usable Space
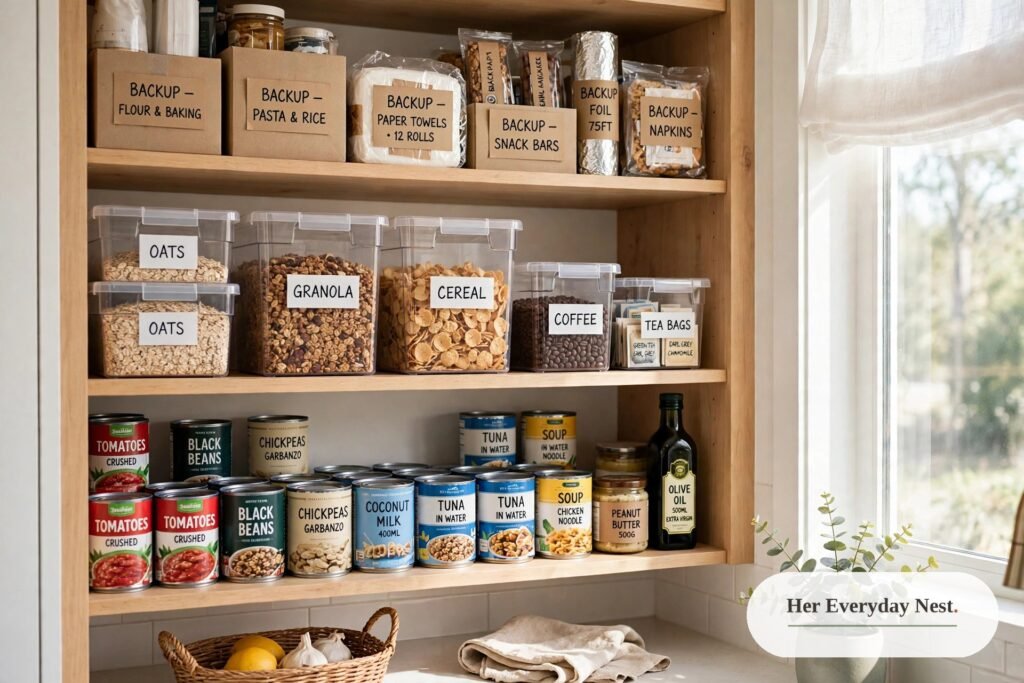
Most small pantries waste 30 to 45 percent of their vertical space. The gap between the top of your canned goods and the shelf above is storage, and a wire or bamboo riser is the cheapest way to claim it. A riser creates a second level on a shelf — cans and jars on the riser, a second row behind and below — so you can see the row behind instead of hiding it. Expandable versions adjust to your shelf width, and they cost roughly $8 to $20 each.
Risers work best for cans, jars, and short containers; they are less useful for tall bottles or cereal boxes, which need full height. Measure the gap between shelves before buying, and leave enough clearance to lift a can off the riser without scraping the shelf above. One riser per shelf is usually enough — two turns a shelf into a staircase that is hard to reach into. Best for cabinet pantries with one tall shelf and a big empty gap above the cans.

5. Put a Turntable in the Deep Corners
Deep cabinets and corner shelves are where food goes to expire, because anything behind the front row is functionally invisible. A turntable — a lazy Susan — fixes that with one spin: oils, vinegars, sauces, and condiments sit on a round tray, and the back row comes to you instead of you digging for it. They cost roughly $8 to $20, need no installation at all, and lift straight out when you move.
Turntables work best for bottles and jars, which are tall enough to grab and heavy enough to stay put while the tray spins. They are a poor choice for small packets or loose items, which slide around and fall off the edge — those belong in a bin. If your cabinet is very narrow, measure the diameter first; a turntable that cannot complete a full rotation is worse than no turntable at all. Best for deep base cabinets, corner cabinets, and anyone whose sauces live in a dark back corner.

6. Turn Deep Shelves Into Drawers With Pull-Out Bins
A deep shelf is really a drawer that you cannot pull. Bins with handles fix that: group each category in its own bin, and pull the whole bin forward to find something instead of reaching past three rows of food. Shoeboxes, sturdy delivery boxes, or dollar-store bins work just as well as expensive ones, and clear bins let you see what is inside without pulling them all the way out. Expect roughly $0 to $8 per bin if you reuse what you have.
Freestanding sliding baskets are the sturdier version — they sit on the shelf with no screws and pull out like drawers, usually $15 to $35. Either way, the rule is one category per bin, and the bin should be shallow enough that nothing hides under anything else. If a bin is too deep, food sinks to the bottom and the whole point is lost. Best for closet pantries with deep shelves, and for renters who want drawer convenience without a single screw.

7. Hang Under-Shelf Baskets for the Dead Space
There is a second kind of wasted vertical space in a pantry: the empty air above short items. Under-shelf baskets slide onto an existing shelf and hang below it, using that gap for wraps, bags, snack packs, or small packets — the flat, light things that never deserve a whole shelf. They cost roughly $8 to $15 each, need no tools, and come off clean when you move out.
Keep them light. Under-shelf baskets are for foil, zip bags, tea boxes, and snack bars, not for cans or full jars — overloading one strains the shelf edge and the basket itself. They also work beautifully under a shelf in a closet pantry for spice packets and sauce sachets, the small flat items that otherwise end up loose in a drawer. If your shelves are wire rather than solid, check that the basket arms grip properly before you load it. Best for narrow pantries where every inch of height counts.

8. Use a Can Organizer So Nothing Hides at the Back
Cans are the worst offenders in a small pantry: they stack badly, they roll, and the one at the back is always the one that expired last year. A tiered can organizer — or a simple rolling can dispenser — keeps cans visible and stacked neatly, oldest in front, so you naturally use them in order. Tiered versions cost roughly $10 to $25, and a tension rod laid horizontally about four inches above a shelf can do the same job for free: rest cans on their sides behind the rod and they roll forward as you take one.
If you do not buy many canned goods, skip the dedicated organizer and use a riser instead — the point is visibility, not the gadget. Whichever you choose, keep one rule: one open can at a time per item, and new cans go behind the older ones, not beside them. Beside them is how you buy a third can, because you cannot see the first. Best for households that cook with beans, tomatoes, and soups most weeks.

9. Decant Only the Open Dry Goods Into Airtight Containers
You do not need to decant everything. Airtight containers are most useful for open bags of dry goods — flour, sugar, rice, oats, cereal — which go stale or attract pests once the bag is open. Square or rectangular containers use shelf space more efficiently than round ones, and a starter set runs roughly $15 to $40; reused glass jars are free and work just as well. Sturdy boxes and cans can stay in their original packaging, where the label, date, and cooking instructions stay readable.
Label the containers with the contents and the date you filled them, not just a pretty word — a label that says “rice” is less useful than one that says “basmati, opened Nov.” Keep the containers to one size family so they stack and line up, and do not buy the set before you measure the shelf: a container that is one inch too tall wastes the whole shelf above it. Best for bakers, bulk buyers, and anyone whose pantry has ever had pantry moths.

10. Claim the Door With an Over-the-Door Rack
The back of a pantry door is prime real estate that most renters ignore. A standard pantry door is around 30 inches wide and 80 inches tall — that is over 16 square feet of usable space, and a hook-over rack claims it with zero tools and zero damage. Slim over-door racks hold spice jars, condiment bottles, snack packets, or canned goods, and cost roughly $25 to $60. A clear over-the-door shoe organizer with 20 or more pockets works the same way for sauce packets, seasoning mixes, tea bags, and small snack bars, for around $12 to $16.
Measure the gap between the door and the frame before buying — if you have less than an inch of clearance, look for a slimline version under 1.5 inches deep, or the door will not close and the rack will scrape the frame. And keep the weight reasonable: door racks are for small, light items, not for full jars of pasta sauce, which strain the hinges. If your pantry is a single cabinet, the same trick works on the inside of the cabinet door with a slim rack or removable adhesive hooks. Best for closet pantries and anyone whose door is currently doing nothing.

11. Use Tension Rods for a No-Drill Extra Shelf for Renter Friendly Pantry Organization Ideas
Tension rods are the renter’s secret weapon, and these renter friendly pantry organization ideas would not be complete without them. A rod grips between two surfaces with spring pressure alone — no hardware, no holes, no security deposit at risk. Installed horizontally, a rod creates a second tier for lightweight items in a standard 12-to-16-inch-deep pantry, or a rolling can dispenser when cans rest behind it. Installed vertically, two rods make a narrow spice rack that holds small bottles upright between them. Rods cost roughly $5 to $15 each and take under a minute to place.
Respect their limits: tension rods hold lightweight things — packets, small bottles, spray bottles hung on S-hooks, a lightweight shelf — not a row of full jars. They also need two solid, parallel surfaces to press against, so they work best inside a closet pantry or under a shelf, not across an open wall. Check the grip monthly, especially in humid kitchens, since a rod that slowly slips will dump its contents one night at 2 a.m. Best for closet pantries, under-shelf gaps, and renters whose lease bans even adhesive hooks.

12. Roll In a Cart When There Is No Pantry at All
Plenty of small apartment kitchens have no pantry at all — not even a closet, just a few cabinets and a tiny counter. A slim three-tier rolling cart is the single best fix: it gives you three full shelves of storage that you can park anywhere — beside the fridge, in a corner, against an empty wall, or even in a nearby hallway. Fill it exactly like a real pantry, with canned goods on the bottom, dry ingredients in the middle, and snacks and daily items on top. They cost roughly $20 to $60, need zero installation, and roll with you when you move.
Measure the gap before you buy. The space beside a fridge or between the counter and the wall is often 6 to 10 inches wide, and a cart that is one inch too wide is useless. Keep heavy items on the bottom tier so the cart does not tip, and do not block exits, vents, appliances, or access to electrical outlets. A slim gap cart beside the refrigerator is the same idea for the narrowest kitchens — it turns a dead 6-inch slot into a full shelf of spices, oils, and cans. Best for studios, galley kitchens, and rentals with no pantry whatsoever.

13. Add a Freestanding Pantry Cabinet That Moves With You
When a cart is not enough, a freestanding pantry cabinet is the closest thing to a real pantry you can buy. A tall, narrow unit with doors and adjustable shelves holds dry goods, canned goods, and snacks in a few square feet of floor space, with no remodeling at all — put it beside the fridge, at the end of a counter run, or on a nearby wall, then use closed bins inside to keep it looking tidy. A mid-size unit around 24 to 32 inches wide is the most flexible choice, since a cabinet that fits one kitchen layout may not fit the next, and it costs roughly $50 to $150.
Two cautions. First, tall furniture should be secured against tipping — most anti-tip kits attach with a few screws into a wall stud, so ask your landlord before installing one rather than skipping it, especially if children visit. Second, measure the ceiling and the door swing: a cabinet that blocks a cabinet door or a walkway is worse than no cabinet. For a wider option, a sideboard with a hutch gives you a countertop for a coffee station plus closed storage for bulky items. If you want more renter-friendly kitchen inspiration, our luxury kitchen decor ideas for renters show how to make a rental kitchen look high-end without renovating. Best for renters who want a real pantry without asking permission for anything.

14. Give Spices Their Own Tiered Step
Spices are the smallest items in a pantry and the easiest to lose. A tiered spice step — a small set of rising shelves that sits inside a cabinet — stops small jars from getting lost behind larger items, and it costs roughly $10 to $20. Put it in a shallow drawer or on a dedicated shelf near the stove, and keep the jars you reach for weekly at the front of the top tier. Magnetic spice jars on a metal sheet are the renter-friendly alternative: mount a $12 metal sheet (or repurpose a cookie tray) inside the door with removable adhesive strips, and the jars stick to it, come off cleanly, and travel with you.
Whatever system you choose, keep spices away from the stove’s heat and steam, which dull their flavour faster than age does — a cabinet near the prep area beats a shelf above the hob. And be honest about the collection: if you cannot name the spice or remember the dish it belongs to, it leaves the shelf. One jar per spice, one open bag per food, and a use-first spot for anything near its date. Best for anyone whose spice collection has quietly grown past twenty jars.

15. Keep It Working With a Use-First Bin and a Monthly Reset
A system only works if it is easy to maintain, and this last idea is the one that keeps the other fourteen from sliding back into chaos. Keep a use-first bin at eye level — opened or close-to-date items go in it, and it gets eaten from first. Put new groceries behind older ones, so the oldest gets used first. Keep a running list on the pantry door or a shared list on your phone, and add items when you open the last one, not when the shelf is already empty.
Then run a monthly ten-minute check: wipe the shelves, move anything near its date into the use-first bin, and note what you keep overbuying. If a category outgrows its bin, adjust the zone rather than squeezing items elsewhere. And if snacks keep migrating to the counter, give them one bin with a clear rule about what lives in it — the counter is not a pantry. For more whole-home systems in the same spirit, our budget-friendly organization tips cover the same declutter-first approach for every room. Best for everyone, and the cheapest idea on this list: it costs ten minutes a month.

A small rental pantry does not need to look like a showroom to work well. If you can open the door, see what you have, and grab what you need without unpacking a shelf, it is doing its job. The order matters more than the organizers: empty and measure first, group into categories, assign zones by frequency, and only then add a riser, a bin, a turntable, or a door rack where a shelf is still hard to use. These renter friendly pantry organization ideas are all removable by design — no holes, no permanent changes, and everything comes with you when the lease ends, which is exactly how rental storage should work. For a detailed step-by-step walkthrough of the same process, The Small Apartment’s small pantry organization guide covers the six steps with costs and pantry-type setups, while Home Storage HQ’s small pantry guide lays out the three rules — vertical space, visibility, and purge first — that every small pantry has to obey. Start with the empty-and-group steps this week, add one organizer, and let the zones do the rest.
How do I organize a small pantry in a rental without drilling?
Use only freestanding and removable solutions: shelf risers, turntables, bins with handles, under-shelf baskets, over-the-door racks, tension rods, rolling carts, and freestanding cabinets. None of them needs a screw or a hole, and all of them come with you when you move. Start by emptying the pantry, measuring the shelves, and grouping food into categories — then add organizers only where a shelf is still hard to use. These renter friendly pantry organization ideas work because the system comes first and the products follow.
What should I do if my rental kitchen has no pantry at all?
Build one from portable pieces. A slim three-tier rolling cart beside the fridge is the fastest fix, a freestanding pantry cabinet gives you a real pantry behind closed doors, and one dedicated kitchen cabinet near the prep area can become a mini pantry with a riser and a few bins. Use the top of the fridge for a lidded bin of light items like snacks or paper goods — but check your fridge manual first, since some models need clear space on top for ventilation. These renter friendly pantry organization ideas are especially useful when there is no built-in pantry at all.
How do I keep a small pantry organized long term?
Three habits do most of the work: put new groceries behind older ones so the oldest gets used first, keep a use-first bin at eye level for opened or close-to-date items, and run a monthly ten-minute check to wipe shelves, move near-date items into the use-first bin, and note what you keep overbuying. If a category outgrows its bin, adjust the zone rather than squeezing items elsewhere — that is how a system survives longer than a month. That is how these renter friendly pantry organization ideas stay working long term.
Should I decant everything into matching containers?
No — decant only open bags of dry goods like flour, sugar, rice, oats, and cereal, which go stale or attract pests once opened. Sturdy boxes and cans should stay in their original packaging, where the label, date, and cooking instructions stay readable. Square or rectangular containers use shelf space better than round ones, and reused glass jars work just as well as a bought set. Measure the shelf before you buy containers: one inch too tall wastes the whole shelf above.
What is the best way to organize spices in a small pantry?
Give spices their own dedicated spot instead of scattering them among the cans. A tiered spice step inside a cabinet keeps small jars visible in rising rows, and magnetic spice jars on a metal sheet mounted inside the door with removable adhesive strips are the renter-friendly alternative. Keep spices away from the stove’s heat and steam, which dull flavour faster than age, and drop any spice you cannot name or match to a dish — a small, used collection beats a large, forgotten one.

Emily Carter is the founder and editor of Her Everyday Nest. After nine years of renting in five apartments across three cities, she's learned how to make any rental feel like home.